Sunday, December 2, 2007

Really Supercute Sea Creatures

When I posted the Supercute Sea Creatures pattern, I gave the first five commenters a free copy.  Lucky for me, June, of Planet June was one of those people.

She made these adorable all-white sea creatures using my pattern.  Her post includes a details about how she sewed each creature and a close-up photo of each, so go read it. :)

For all you crochet lovers, June sells awesome amigurumi patterns for a staggering array of cute animals.  Definitely check them out.

Friday, November 23, 2007

Supercute Sea Creature Patterns & Instructions

I'm so excited about completing another pattern, which you can now get on the free downloads page. I designed the octopus in April, and he languished on my craft table since then.  Just last week, I decided to re-do my starfish pattern and add a jellyfish and fish to the group.

They are all easy-to-make and perfect for customizing.  There's lots of room for experimenting with color combinations and embellishments.  I think an all-white set would be really cool, too.  There are a couple extra photos in the Futuregirl Supercute Sea Creature Flickr group.

Each creature is between 3 and 4 inches tall and wide, which makes them the perfect size for ornaments, package tags, or clip-ons for backpacks.

Thursday, November 22, 2007

Anticraft Project Three

I was really excited that a crochet project of mine was included in the Anticraft  book.  I designed this lined crochet tote bag so it would be a canvas on which you could add your own personalized design.  I submitted two designs for the book.

The "I [Skull] Trouble Tote" is actually mentioned in the promotional blurb, which totally set me on fire when I noticed.  I included a chart for the whole alphabet with this design so that the saying could be personalized,  Everyone has something important to say on their tote, right? :)

The second design is the Apothecary Tote.  I was inspired by Victorian apothecary medicine bottles.  When I was adding this design to the tote using my graph paper chart, I miscounted the spaces and had to redo it 4 or 5 times.  It was driving me nuts!  But I really loved how it turned out.


While writing up the crochet instructions for the tote, I realized how hard it is to actually explain in words how I do the seamless crochet technique.  Supplementing this pattern is a lot of the reason I put my seamless crochet tutorial on the web.

I also plan on posting a tutorial showing how I hand sew my linings into my crochet bags.  Several people have asked about it, and it would be a good supplement for the book, as well.

I'm compelled to write tutorials because I HATE it when I get the instructions for a project and they blithely say things like "sew the lining into the tote."  HOW?!  It seriously drives me nuts when they give no hint or clue about the techniques they actually used to do it.  I don't want to be a part of THAT problem. :)

Wednesday, November 21, 2007

Anticraft Project Two

I originally designed the Bad Eggs around Easter of 2006.  I did a set of four in black with embroidered designs.  At the time, I thought subversive Easter eggs (traditionally-colored eggs with non-traditional imagery) would be hilarious, and I got my chance to make some when they were accepted  for the Anticraft  book.

Look at that squirting arterial blood!  I can't tell you how much I love that decapitated bunny.  It warms my heart.  I couldn't be happier about how it turned out.  The white-on-white embroidery outlining his leg doesn't photograph well, but it looks good in person.  His tail is a bunch of floss loops making a 3-D puff.

Ahhhh ... a cute chick with a taste for eyes.  Chirp!  The eyes filling the basket are made with a tiny sequin and a black seed bead ... and embroidered eyelashes.  I do realize that if a chick was digging the eyeballs out of peoples' heads and collecting them in a basket that they wouldn't still have eyelashes, but I think that makes it all the more creepy. :)  It totally oogs me out that the chick is holding an eye by the optic nerve.

The other two eggs in the Bad Eggs set are based on the original designs.  One is embroidered with 360° flames and the other has evil eyes on each side in alternating warm and cool colors.

Certainly, you could make non-snarky Easter eggs with the pattern ... but why would you? ;)

Tuesday, November 20, 2007

Anticraft Project One

Amazon.com is already shipping the Anticraft book!!!  I don't have my free copy yet.  I'm freaking out because I can't see the book and the pictures of my projects.  Is it professional looking?  Is it a nice book?  Are the instructions for my projects accurate? Ack!

Deep breath.

Without further ado, here is project one of the three projects I have in the book:

You probably recognize the Three Owls, the first original stuffies I designed.  For Anticraft I made them a little scarier.  Thank goodness for the felt and floss stash.  Look at all those greys!

This project might seem a little anticlimactic, which is why I started with it.  I love my sweet little owls, though, and I think their goth/industrial incarnation is cute in a menacing kind of way.

The red beady eyes on the little one make me think of Amityville Horror, which I read in one night when I was in the third or forth grade.  I wasn't quite old enough to realize "based on a true story" didn't mean it was true.  It scared the hell out of me. In that book, the demon, which appears as a pig sometimes, also appears as a set of red glowing eyes.  I swear, the red dots on my alarm clock still creep me out a little because of that book.

Tuesday, October 30, 2007

The Seahorse Family Stuffies Pattern Is Available

** update: This pattern is now available as a free download! **

Yay!  I can't believe how fast I finished up the pattern and all the web changes I needed to make.  The PDF includes the pattern pieces and instructions for both an adult and a baby seahorse.  They are super cute, if I say so myself.

You can check out the seahorses made by my awesome testers in the Futuregirl Seahorse Stuffies Flickr group.  Thank you so much Korallin, Diane, and Sara!

I should have mentioned in my last post that Andrew is the genius behind the seahorse photos.  He's the one that knows how to light things, knows how to position things, and knows how his camera works ... you know, everything.  I've learned a ton from him since I started this blog.  We always have so much fun setting up the elaborate photo shoots together.  He's the best and I'm so lucky he's mine!

Last night after I posted, I tied my copy of Crochet Me closed.  I'm totally serious.  I didn't just do it for the blog.  I haven't even opened it once - not once.  I think if I hadn't tied it closed, I would have been crocheting today instead of finishing up the pattern.  Now I'm so excited to get started on swatching!

Monday, October 29, 2007

Teasing You With Baby Seahorses

** update: pattern on free downloads page **

I'm *this close* to finishing the pattern and instructions for the my seahorse stuffies.  I know I shouldn't say anything before it's ready, because I'm totally jinxing myself, but I'm sure it'll be up soon!

I'm including the pattern and instructions for both adult *and* baby seahorses.  The adult pattern looks just like Sasha and the baby pattern is what I used to make the two little cuties pictured here.

The only thing holding me back is that I just got my copy of Crochet Me in the mail and I'm fighting the urge to start swatching for the Icelandic Cowl.  I've decided that I'm going to use every bit of my will power and not open the book until I have the seahorses finished and posted.

I'm not sure if I'll be able to resist ...

Here's a little behind-the-scenes shot from today.  It's pretty ridiculous how much I love setting these things up. Oh, I just realized I need to add 'photoshop out the strings' on my list of things to do ... I better get to work! :)

Saturday, October 6, 2007

Tutorial: Choosing A Stitch For Hand Sewing

Now that I have two tutorials on hand sewing felt, I thought it would be a good idea to talk about the benefits and disadvantages of both.  Each works well and brings a distinct look to your hand sewn item.  It's worth it to think about what sort of effect you are going for to help you choose the right stitch.

Whip Stitch        tutorial    project featured above

I like to use whip stitch to sew together felt stuffies when I want the stitching to melt into the stuffie.  Usually, I use thread that matches the felt when I use whip stitch.  Occasionally, I will use a contrasting thread color with whip stitch to get a more primitive, hand made vibe going.  In the case of my rose pincushion, I tried to create a woodcut feel with whip stitching.

Benefits : Whip stitch is great for sewing together stuffies when you want the seams to meet up flatly to create a shape.  This is especially good for round shapes, like heads or bodies.  Whip stitch is also pretty simple and forgiving of mistakes, especially when you use a matching thread color.

Drawbacks : Whip stitch doesn't always come out as straight or evenly spaced as you might hope because the thread goes diagonally through the felt on the inside bit of the stitch.  This can also cause your felt pieces to come out uneven near the end of your work, unless you are careful about "felt creep."

Blanket Stitch        tutorial    project featured above

I use blanket stitch when I want a decorative edging on my hand sewn item.  It's especially interesting when done in a contrasting thread color as an edging for a patch, like my travel stickers, or along the seams of a 2-D stuffie.  Blanket stitching is easy, once you get started, and I think it looks very professional and bold.

Benefits : When using blanket stitch to sew the seams of a stuffie, there won't be any "felt creep" because the needle goes straight through the felt from front to back.  Because blanket stitch creates a thread outline along the edges of your piece, it can mask uneven edges and wonky cutting.  Blanket stitch seems to be easier to use to create evenly spaced stitching than whip stitch.

Drawbacks : When using blanket stitch to sew together stuffies, it becomes a ridged seam that is equal to the depth of your stitch.  This creates ridges in 3-D stuffies that might look weird and distort the stuffie's shape.

If you have any thoughts, lessons-learned, or blog posts about hand sewing that you'd like to share, please leave a comment.  Lots of people come to my site after searching for "hand sewing" so people (including me!) really want to know your tips and tricks.

Sunday, September 30, 2007

Tutorial: Hand Sew Felt Using Blanket Stitch

This post actually contains two tutorials involving the blankets stitch:
  • How to sew two pieces of felt together using blanket stitch

  • How to sew an edging using blanket stitch

There are also some helpful extras, like:
  • How to start if you aren't going all the way around

  • How to handle corners

  • How to stitch around circles

  • What to do if you run out of floss in the middle

It's a lot to pack into one post, but they all involve the blanket stitch, so I thought they should all be together.  Let me know if there is something I can make more clear.

For other options to hand sew felt see my whip stitch tutorial and my post about choosing between blanket stitch and whip stitch.

Note One: All stitches should go in and come out the same distance back from the edge of the felt.  When making an object that will be stuffed, about an eighth of an inch works well.  If you are making an edging, use whatever length looks best.  Also keep your stitches the same distance apart.

Note Two: I used to struggle with knotting my floss, but Heather Bailey's Best Knot Ever Tutorial changed my hand sewing and embroidery forever.  Seriously.

Sewing two pieces together (and how to stitch around a corner)


(1) Place the wrong-sides of the felt layers together.

Take your knotted floss and go from the inside of the front layer through to the outside. The knot should be sandwiched between the two layers with your floss coming out of the front layer.


(2) Insert the needle to the left of where the floss is coming out of the front piece.


(3) Pull the floss through most of the way, then put your needle through the loop from the back to the front.

Pull the first stitch so it is a little loose.  You will need the loose floss to complete the last stitch.  See next image for reference.


(4) Insert the needle to the left of your last stitch.


(5) Pull the floss through most of the way, then put your needle through the loop from the back to the front.  Pull this stitch (and all subsequent stitches) tight so the vertical bar is straight up and down.

Continue across using step 4 and 5.


(Corner 1) Make the last stitch before the corner so your needle goes in right where the inner corner of a square would be if you made a square from the corner.  See inset in image for clarification.


(Corner 2) Insert needle into same place as last stitch.


(Corner 3) Complete stitch so that bar is diagonal from the needle insertion point to the corner.


(Corner 4) Insert needle into the same place as the last two stitches.


(Corner 5) Complete stitch so that the bar is perpendicular to the first corner stitch.

Continue across using step 4 and 5.


(6) Finish the last stitch before you need to join to the beginning.


(7) Place your needle under the vertical bar of the first stitch.


(8) Insert your needle in the back piece of felt so the tip comes out between the pieces of felt at the top (see next image for reference).  Your needle should go in the back piece where the stitch would normally come out.


(9) This is the same step as the last one, just a different view to show you how the needle is going in through the back piece and coming out between the felt pieces at the top.


(10) Pull tight.  This is why the first stitch needs to be a little loose, because it becomes a right angle in this step.  The stitches should all look right now.

Place your needle under the back bar you just created and make a knot.


(11) This is the completed knot.


(12) Insert your needle between the felt pieces and have the end come out somewhere else on your piece.  Pull the thread through and tug a little to bury your knot between the felt pieces.


(13) You're done!


How to start if you aren't going all the way around


(1) This is a technique I use when I'm doing just a little bit of blanket stitch, such as the bottom edge of this jellyfish.

Place the wrong-sides of the felt layers together.

Take your knotted floss and go from the inside of the front layer through to the outside. The knot should be sandwiched between the two layers with your floss coming out of the front layer.


(2) Insert your needle in the back piece of felt so the tip comes out between the pieces of felt at the top (see next image for reference).

If you are stitching the edging on a single piece of felt, put your needle through the starting knot in this stage.


(3) Pull the floss through to tighten stitch.  The thread should be coming out from between the felt layers to the left of the stitch.


(4) Put your needle under the first stitch on from right to left.


(5) Pull the needle through.  There is now a loop around the top of the first stitch.


(6) Continue blanket stitch according to instructions above (step 2). When you start the blanket stitch this way, the first stitch stays vertical.


Sewing an edging (and tips for round objects)


(1) Insert your needle from the back of the piece so it comes out the front.


(2) Insert the needle to the left of where the floss is coming out of the front piece.


(3) Pull the floss through most of the way, then put your needle through the loop from the back to the front.

Pull the first stitch so it is a little loose.  You will need the loose floss to complete the last stitch.

If you are stitching around a circle, make this stitch VERY loose.  You will need lots of extra floss to complete the last stitch.


(4) You will make your stitches following step 4 and 5 above.  When stitching around a circle keep your stitches straight by holding the circle so your stitch is at the top and imagining your stitch continues down the circle through the center. The red arrow is your imagination.


(5) Here is the next stitch and it's blue imaginary arrow.  See how the red and blue arrows cross in the center of the circle?  All of your stitches should point toward the middle.


(6) Complete the edging by putting your needle under the vertical bar of the first stitch.


(7) Pull tight.


(8) On the back, put your needle through the initial knot.


(9) Make your final knot.


(10) You're done!


What to do if you run out of floss in the middle


(1) Knot your floss at the top of the last stitch.


(2) Insert your needle (threaded with knotted floss) into the knot you just made and pull until the new knot is against the knot you just made.  Both should be hidden between the pieces of felt.


(3) Insert your needle into the felt to the left of your last stitch.


(4) Complete the stitch as normal.

Monday, July 30, 2007

Tutorial: Crochet Beaded Bracelet

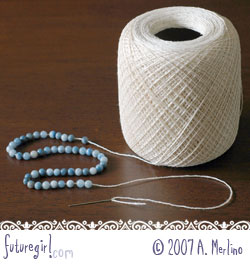
I've found another use for my crochet cotton thread - a beaded bracelet. It's great for summer, when you might be getting sweaty, dirty, or jumping in the pool (sea, lake, whatever), because it's washable - so you don't even have to take it off.

This pattern could easily be changed to be an anklet or choker.  It's a simple single crochet, so you can add stitches to make it wider and rows to make it longer.  I used beads for my bracelet, but you can use anything you can string on the thread: beads, buttons, sequins ... use your imagination *and* your stash.

I reserve the copyright on the pattern and the instructions (which means you can't reprint this anywhere), but feel free to make all the bracelets you want and do anything you want with them (yep, you can sell them).

If you make a bracelet, let me know.  I'd love to see it!

Supplies

Crochet Cotton Thread
48 beads
1 button
big-holed needle
size C (2 or 2.75mm) crochet hook

Abbreviations

sl = slip stitch
ch = chain
sc = single crochet
bsc* = beaded single crochet

*Bead Single Crochet: (bsc): Do a normal single crochet, except after you put your hook through the stitch in the previous row, pull a bead up to your hook and then yarn over using the crochet cotton thread on the far side of the bead.  Then pull the loop through the stitch in the previous row.  You will now have two loops on the hook and the bead will be looped against the piece.  Yarn over and pull through both loops to complete the single crochet.

Basic Instructions

· Thread 48 beads on crochet cotton thread.
· ch 7, leaving about 10" of crochet cotton thread before the start of the chain.
· Row 1 - Starting with 2nd ch from hook, sc in each of the next 6 ch, ch 1, turn.
· Row 2 - sc in each stitch across (total 6), ch 1, turn.
· Row 3 - sc in each stitch across (total 6), ch 1, turn.
· Row 4 - sc, bsc, sc, bsc, sc, bsc, ch 1, turn.
· Row 5 - sc in each stitch across (total 6), ch 1, turn.
· Row 6 - 2 sc, bsc, sc, bsc, sc, ch 1, turn.
· Row 7 - repeat Rows 3-6 until you've used all the beads.
· Last Row - sc in each stitch across (total 6), ch 3, turn.
· Button Hole - skip 5 stitches, sc in last stitch of previous row, finish off, weave in end.
· Attach button with 10" thread at beginning of bracelet and weave in end.

Detailed Instructions (text is above, or next to, its corresponding photo)

1) Thread 48 beads on crochet cotton thread.  I bought sky quartz beads.  They were $6 for two packs of 24.  When you're stringing your beads, count them two times, and then count them again.  All of the beads must be on the thread before you start, so it pays to make sure they are all there.  I used the big-eyed needle to thread them on.


2) Chain 7. Leave about 10 inches of thread before you start crocheting.  This will be used to attach the button later.

I'm a tight crocheter.  I've found I need to make these chains extra tight or else the first row is much wider than the rest of the rows. Usually I don't have to worry about this, but I do with the crochet cotton thread.

3) Row 1 - Starting in the 2nd chain from the hook, single crochet in each of the next 6 chains (total 6 single crochet), chain 1, turn.

4) Row 2 & 3 - Single crochet in each stitch across (total 6 single crochet), chain 1, turn.

5) Row 4 - Single crochet, bead single crochet, single crochet, bead single crochet, single crochet, bead single crochet, chain 1, turn.

Below are photos of the bead single crochet (bsc).  [A] put hook in the stitch of the previous row and pull a bead up to the hook.  [B] Yarn over using the thread on the far side of the bead.  [C] Complete the single crochet as normal.

6) This is the completed Row 4.

You may be wondering why the beads aren't centered on the bracelet.  I found that if I had a five-stitch-wide bracelet and I put a bead on stitch one, three, and five, that the first bead looked like it was hanging off the edge of the bracelet.  The way the bead is secured by a diagonal thread makes it lay to the right a little.  That's why I added a stitch before the first bead.

7) Row 5 - Single crochet in each stitch across (total 6 single crochet), chain 1, turn.  While you crochet this row, the beads are facing you.

8) Row 6 - single crochet, single crochet, bead single crochet, single crochet, bead single crochet, single crochet, chain 1, turn.

This row only has two beads and they are offset from the beads in the three-bead rows to create a pattern.  You could change when you make the bead stitches to create a different pattern if you want.

9) Repeat Rows 3, 4, 5, 6 until you've used all the beads.  Below is what your bracelet will look like after your first repeat of Row 3.

10) Last Row - Single crochet in each stitch across (total 6 single crochet), chain 3, turn.

11) Button Hole - skip 5 stitches, single crochet in last stitch of previous row.  You might want to wait to finish off your bracelet until you can test if the button hole is big enough for your button.  If it's too big or too small, adjust the number of chains.  The important part is that your chain starts at one corner and your single crochet is at the other corner.  This makes a clean edge with no poky or floppy bracelet corners.

To finish off, make a chain and pull through a big loop.  Cut the loop and pull the cut end completely through the last chain.  Pull tightly.  Use the needle to weave the end into the bracelet.  Trim off any extra thread.

12) You are going to attach the button using the 10-inch tail of thread you left at the beginning of your bracelet.  Use the needle to weave in the spaces between the stitches of the first row.  First come from the back to the front in the first space, from the front to the back in the second space, and then from the back to the front in the third space.  Your needle will now be coming up in the space just to the right of the middle of the bracelet.

13) Pull the thread tight to gather the stitches together, then thread the button by coming from behind to the front.

14) Next, go through the button from the front to the back.  Thread the needle through the spaces of the rest of the row just like you did the first half of the row.

15) Pull the thread tight to gather all the stitches.  This will make a clean edge free of poky, floppy corners on this end, too.  Make a knot (just like a normal embroidery knot: half-way insert the needle behind a thread in the bracelet, wrap the thread from the needle around the needle twice, pull the needle through the wrapped thread).  Weave in the end and trim the excess thread.

16) That's it!  You're done.

Let me know if you have any questions or you find any typos. :)